The daily pricing is determined by pricing templates. By default, newly created products will be associated with the default pricing template:
Day 1: $20
Day 2: $15
Day 3+: $10
This article will teach you how to:
- Create a new pricing template
- Link pricing templates to products
- Edit existing pricing templates
Add Pricing
Adding pricing involves two major steps:
- Create a pricing template.
- Associate the pricing template with products.
Create Pricing Template
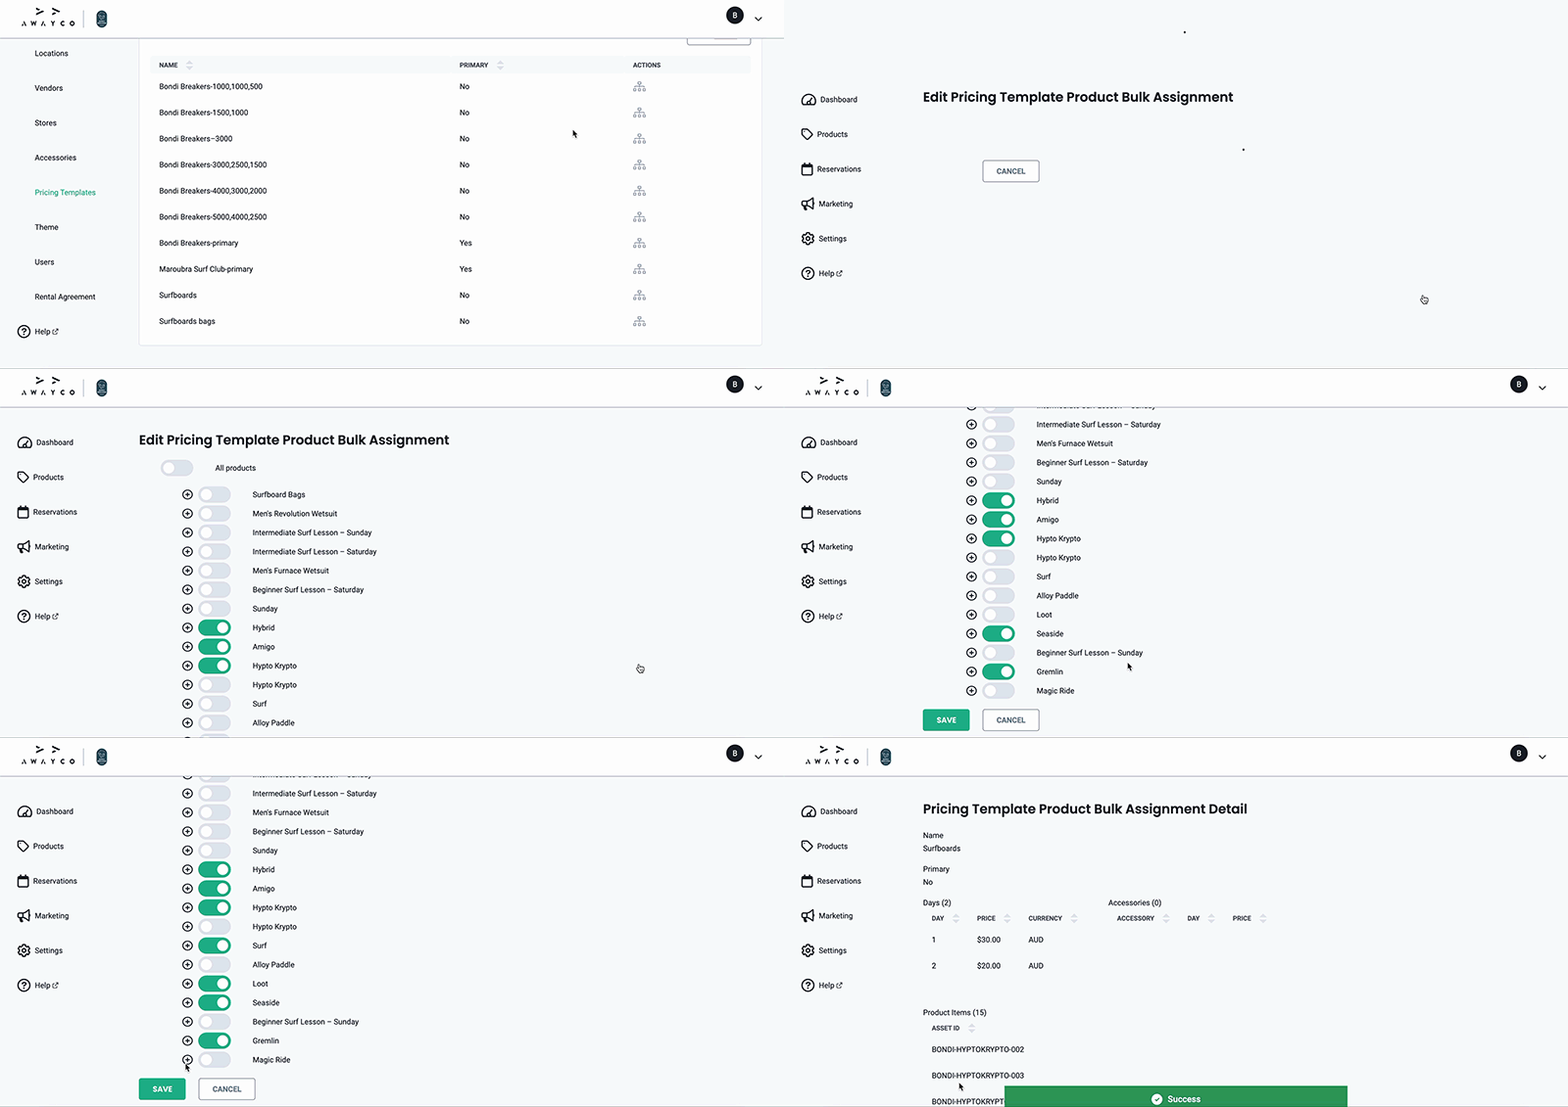
- In the Admin app, navigate to the Pricing Templates tab under Settings in the sidebar.
- Click the add pricing template button in the upper right corner.
- Select the store from the dropdown menu.
- Write the name of the pricing template. There are no restrictions on the name, we recommend using either the daily pricing or the type of products the pricing applies too, e.g. 'Day 1: $50; Day 2: $40' or 'Surfboards'
- Set the pricing per day. The price of the final day will be the default pricing for any bookings longer than the set days.
- Add up to 14 days by clicking the add day button; remove days by clicking the remove day button.
- Click the create pricing template button.

Associate Pricing Template with Products
There are two methods to link pricing templates with products. Either associating an entire product with a pricing template, including its variants; or linking each variant individually with different pricing templates.
Bulk Linking
- In the Admin app, navigate to the Pricing Templates tab under Settings in the sidebar.
- Select the icon to open the bulk pricing template editor. This is a list of all the available products.
- Toggle on the relevant products that are associated with the pricing template.
- Click the save button.
- The pricing of the products has now been updated.

Variant Linking
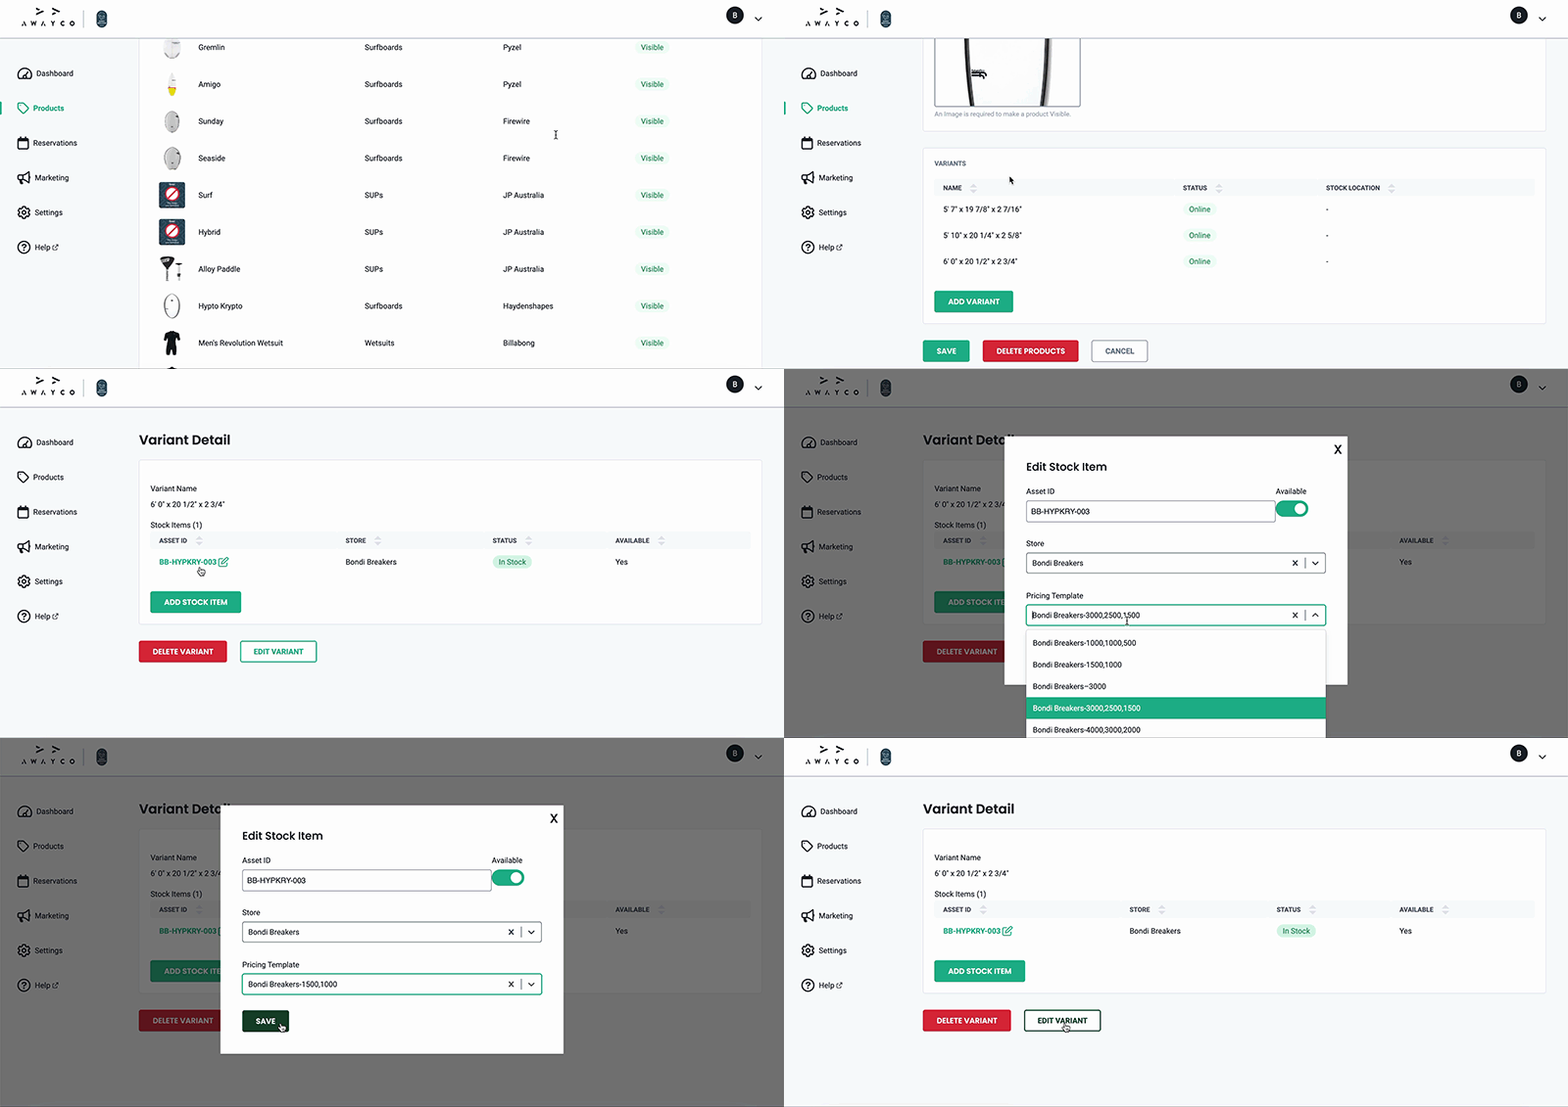
- In the Admin app, navigate to the Products tab.
- Select a product to open the edit product page.
- Scroll to the bottom of the page and select the variant to open the variant detail page.
- Select the asset ID to open the edit stock item pop-up.
- Select the pricing template from the dropdown menu.
- Click the save button. The pricing of the products has now been updated. How much a customer pays for their rental will be determined by the chosen variant.
- Repeat steps 3–6 for each variant.

Edit Pricing
Using the Admin app, you have the flexibility to edit any element of a pricing template.
- In the Admin app, navigate to the Pricing Templates tab under Settings in the sidebar.
- Click the name of a pricing template to open the editor page.
- Click the edit pricing template button at the bottom of the page.
- Make the required changes.
- Click the save button.
