Products are your inventory, the items that you rent out to customers. This article will teach you how to:
- Add products
- Edit existing products
- Remove products permanently or temporarily
Add Products
Adding products includes four major steps:
- Create a product.
- Create variants of the product.
- Create asset IDs for each variant of the product.
- Toggle the visibility of the product.
Create Product
- In the Admin app, navigate to the Products tab in the sidebar.
- Click the add product button in the upper right corner.
- Write the name of the product.
- Write a description of the product in the text box. Using the text editor you can create lists, bold and highlight text, and embed videos.
- Select the vendor of the product. The vendor is the manufacturer who created the product. Previously created vendors can be selected from the dropdown menu; new vendors can be created by writing the name.
- Select the category of the product. The category is how the products are grouped together, customers can use categories as filters for searching your web store. Previously created categories can be selected from the dropdown menu; new categories can be created by writing the name.
- Upload images of the product. These should be a png file with a transparent background.
- Click the create product button.
- A green 'success!' banner will indicate the product has been created.

Create Variants
After creating a product you must create a variant. The variant is the specific type of the product. For example, its size or colour. Customers will select the variant from the dropdown when renting products.
- Click the add variant button at the bottom of the edit product page.
- The variant creation pop-up will open.
- Type the name of the variant.
- Click the create variant button.

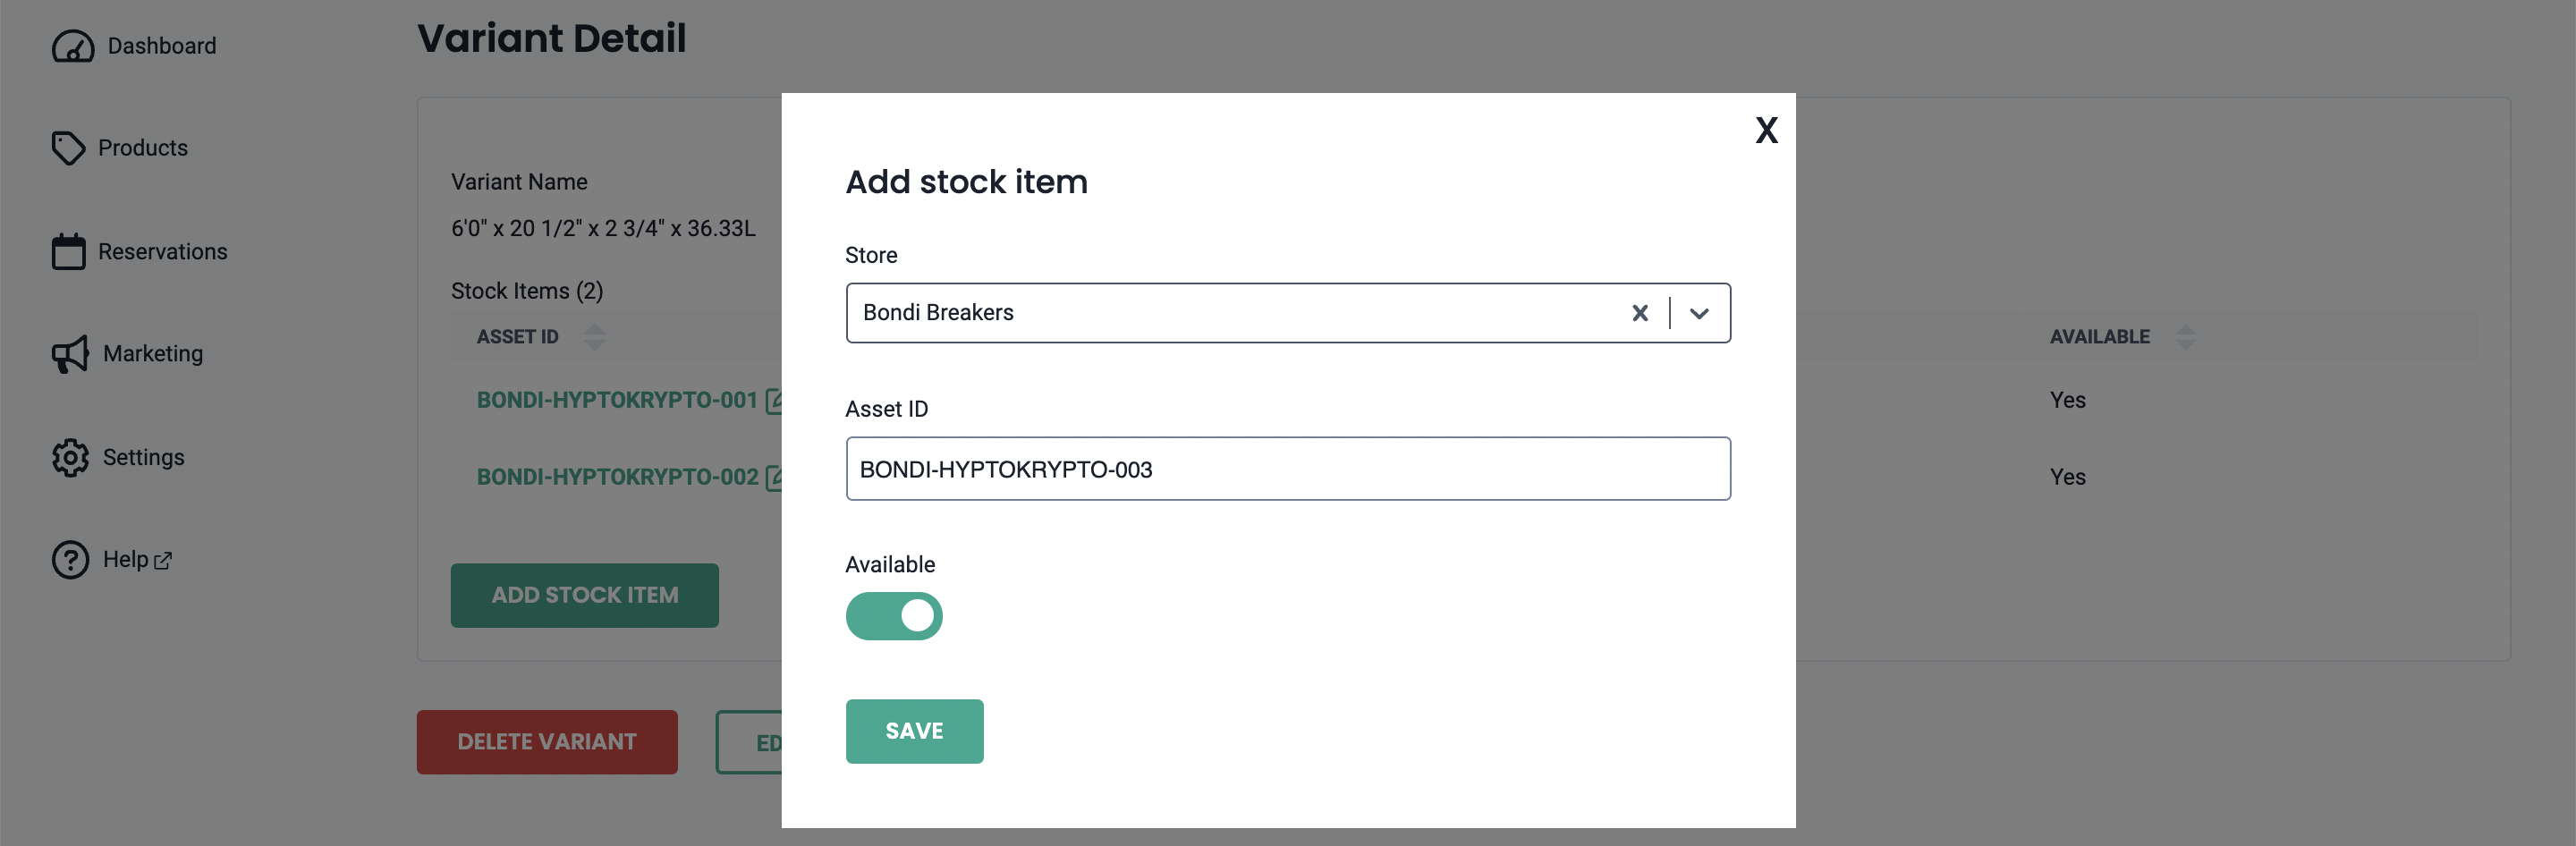
Create Asset IDs
After creating product variants you must add an asset ID to each variant. The asset ID represents a single unit or stock item of a product.
- Click the name of the variant to open the variant detail page.
- Click the add stock item button.
- Select the store where the product is located.
- Write the unique asset ID for the unit. If you store already uses IDs to identify products, we recommend using these.
- Toggle the product to available.
- Click the save button.
- Repeat steps 2–6 to add multiple asset IDs to a variant.
Toggle Visibility
By default, a product is hidden on the web store until it the visibility is toggled on. Read our complete guide on product visibility.
- Open the edit product page.
- Click the visibility toggle in the upper right corner.
- The toggle will turn green.
- Click the save button. When viewing the list of products, it will now have a green visible tag.
After creating products, you should update their pricing. Read our guide on how to create pricing here.
Edit Products
Using the Admin app, you have the flexibility to edit any element of a product.
- Navigate to the Products tab in the Admin app.
- Click the name of a product to open the editor page.
- Make the required changes.
- Click the save button at the bottom of the page.

Remove Products
There are many different options to either permanently or temporarily remove products using the Admin or Point-of-Sale apps:
- Delete products permanently using the Admin app.
- Delete product variants and asset IDs permanently using the Admin app.
- Remove product variants and asset IDs temporarily using the Admin app.
- Remove product variants and asset IDs temporarily using the Point-of-Sale app.
Admin App
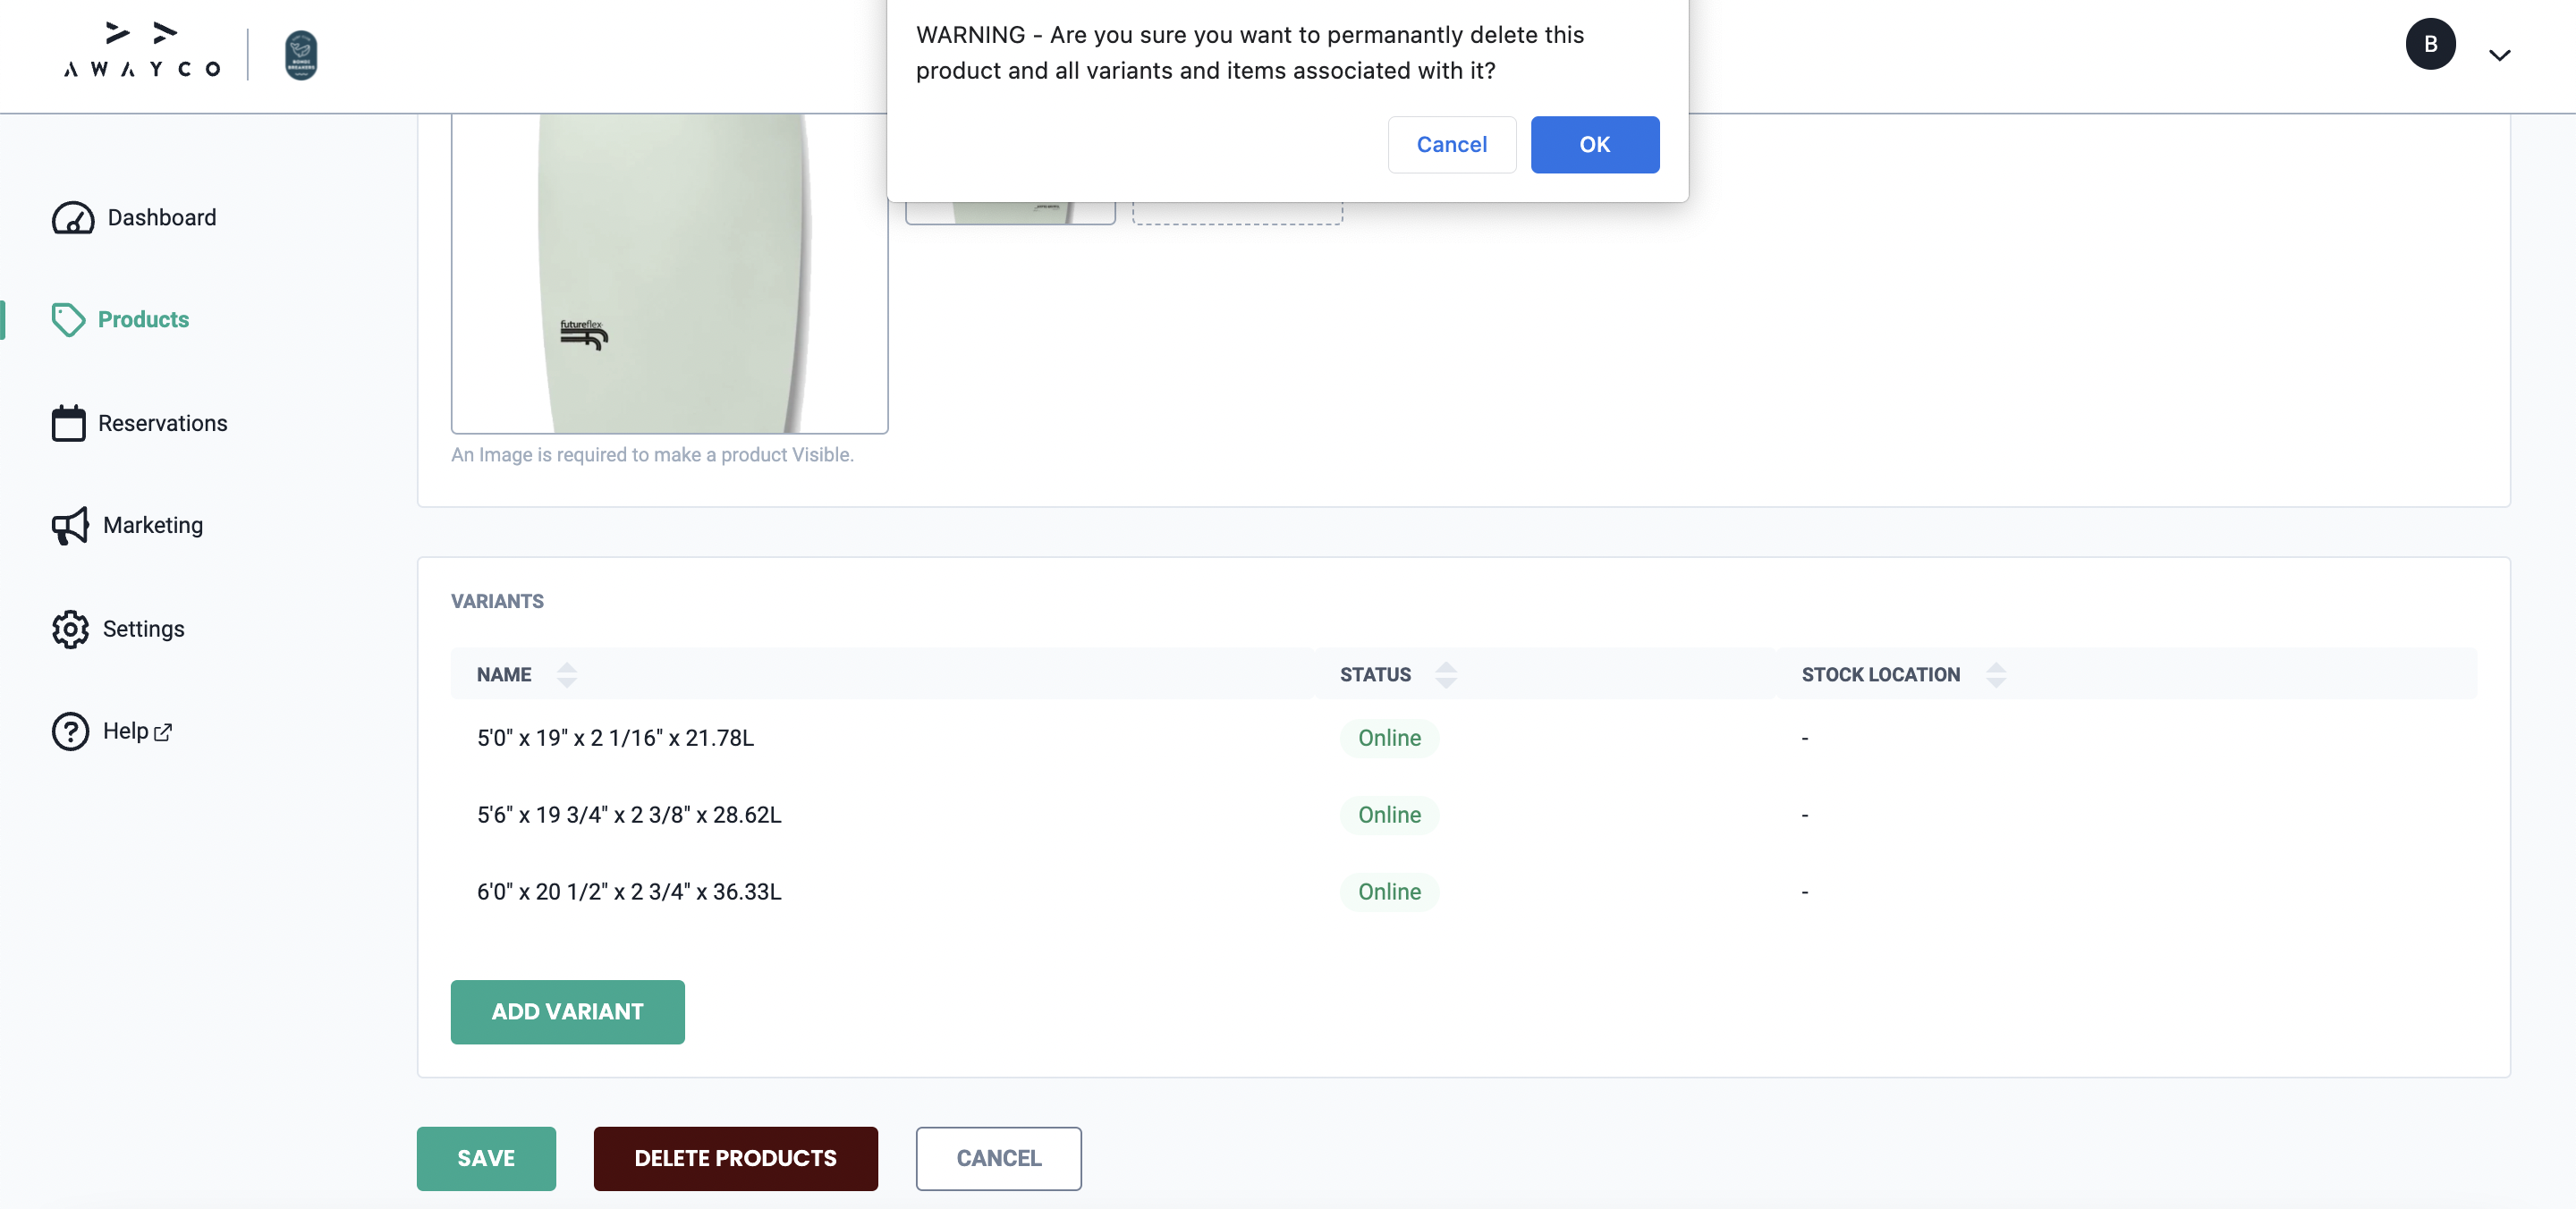
Delete Products Permanently
This method will delete a product and remove it from your store inventory permanently.
- Navigate to the Products tab in the Admin app.
- Click the name of the product.
- Click the delete products button at the bottom of the page.
- A pop-up warning will appear. Click the ok button to proceed.
- The product has now been permanently deleted.
Remove Products Temporarily
This method will change a product's visibility and hide it on the web store. Customers will not be able to rent it until it the visibility is changed again. However, it will not impact upcoming bookings for the product.
- Navigate to the Products tab in the Admin app.
- Click the name of the product.
- Toggle the visibility of the product off. This will hide the product on the web store without cancelling any upcoming bookings. Read more about toggling visibility here.
- Click the save button.
Delete Product Variants and Asset IDs Permanently
This method will delete the variants and asset IDs associated with a product. If a product has no variants and asset IDs associated with it, it will not appear on the web store.
- Navigate to the Products tab in the Admin app.
- Click the name of the product.
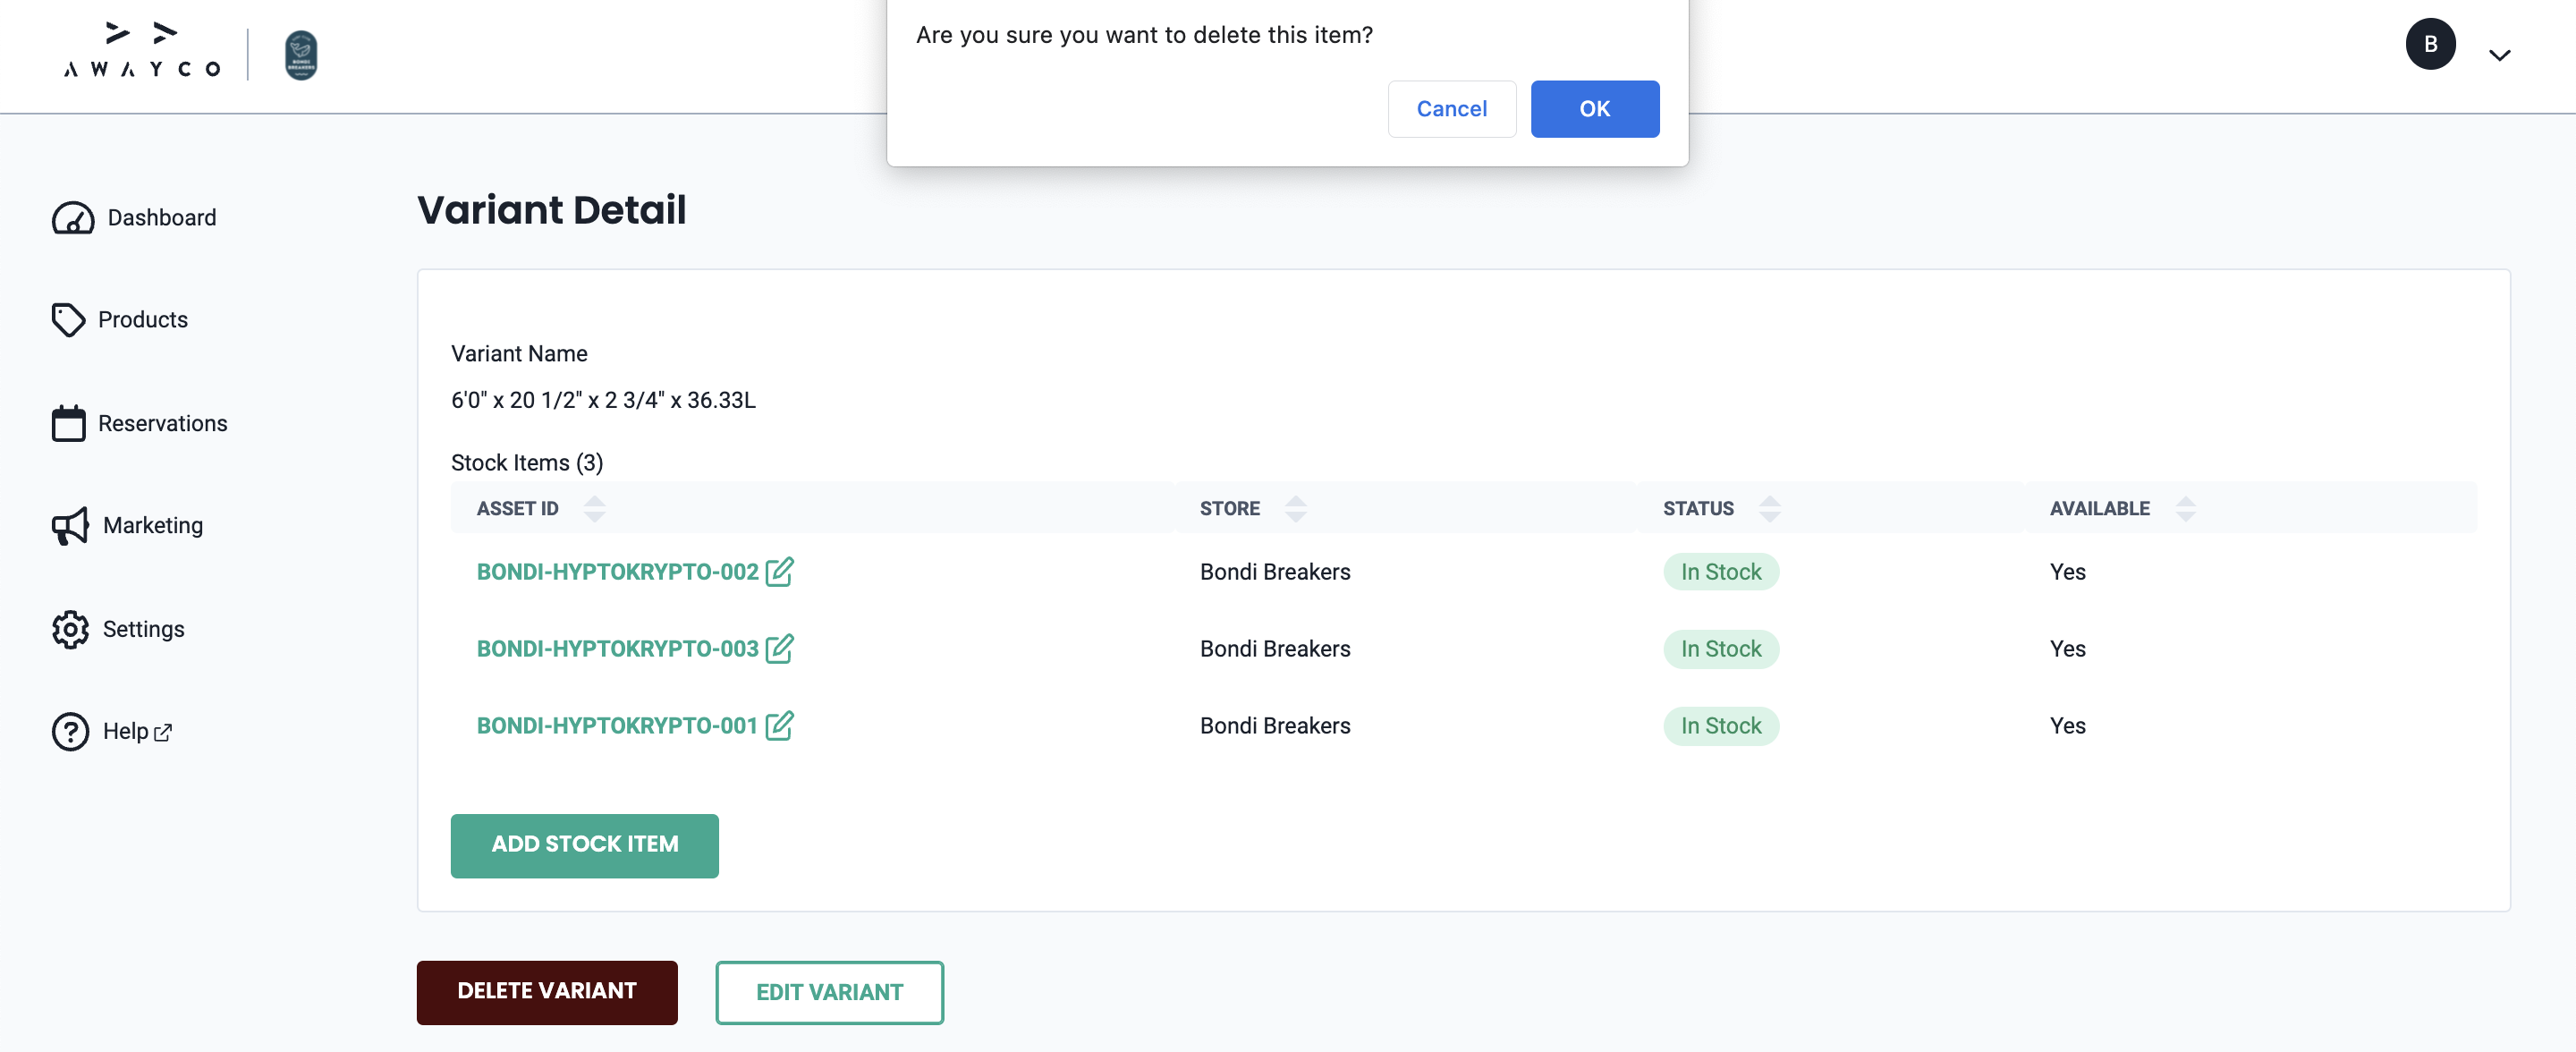
- Click the name of the variant to open the variant detail page.
- Click the delete variant button at the bottom of the page.
- A pop-up warning will appear. Click the ok button to proceed.
- The product variant and its asset IDs have now been permanently deleted.
Remove Variants & Asset IDs Temporarily
This method will make variants of a product unavailable to rent. If a product has no variants and asset IDs associated with it, it will not appear on the web store.
- Navigate to the Products tab in the Admin app.
- Click the name of the product.
- Click the name of the variant to open the variant detail page.
- Click the name of the asset ID to open the stock item editor.
- Toggle the stock item to unavailable. This unit of the product is no longer available to be rented. If it is the only asset ID, the variant and its product will be removed from the web store.
- Repeat steps 3–5 for each asset ID and variant to be removed. Repeat these steps again to make the items available again.

Point-of-Sale App
Remove Variants & Asset IDs Temporarily
This method will make variants of a product unavailable to rent. If a product has no variants and asset IDs associated with it, it will not appear on the web store.
- Navigate to the Inventory tab in the Point-of-Sale app.
- Select the product to be turned offline.
- Click the in service toggle.
- The product unit is now unavailable to rent online.
- Repeat steps 2–4 for all relevant variants and asset IDs to remove a product entirely. Repeat these steps again to make the products available to rent again.